IRIS OpenSpace within Taxfiler
IRIS OpenSpace is a safe, simple and secure online collaborative tool for accountancy practices and clients to share documents with each other and get client approval electronically.
You are able to publish documents to the IRIS OpenSpace online portal directly from Taxfiler. Your clients are then able to log into IRIS OpenSpace to view and/or approve the documents.
The approval status of the document is automatically updated in Taxfiler when the document has been approved by your client.
IRIS OpenSpace:
- allows you to upload, store and approve documents online
- offers a high-level security – only you and your clients can view documents
- can be customised with your own logo and colour scheme
- is fully integrated with Taxfiler
For more information on IRIS OpenSpace, see IRIS support
Setting up IRIS OpenSpace integration within Taxfiler
To activate the IRIS OpenSpace integration, click the Connections icon on the Taxfiler menu and select the IRIS OpenSpace tab.
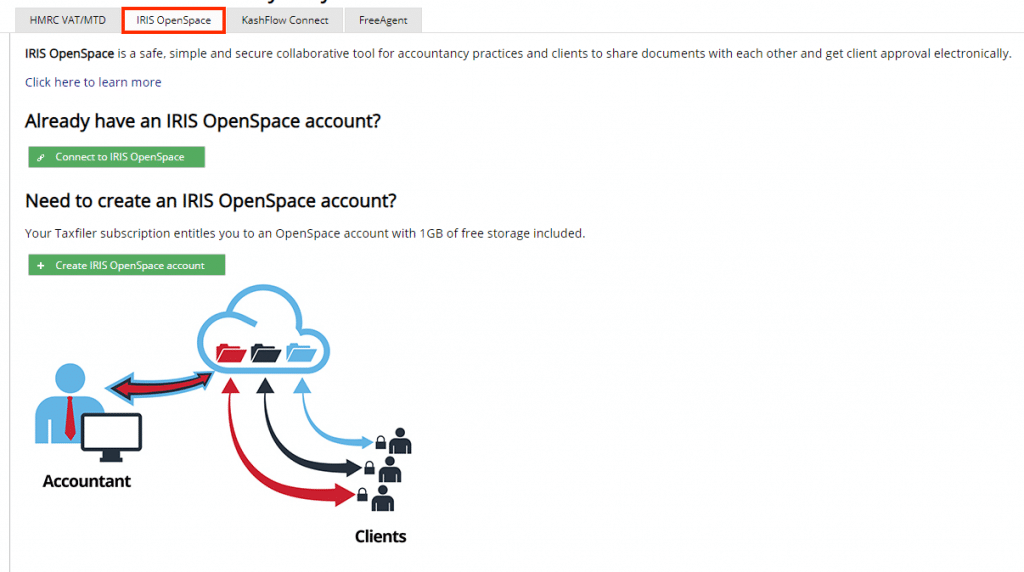
Linking an IRIS OpenSpace account
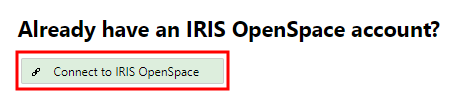
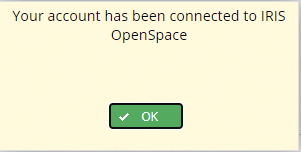
To link to an IRIS OpenSpace account, click , and enter the IRIS OpenSpace Username and Password. If the account is found in IRIS OpenSpace a message will be displayed confirming ‘Your account has been connected to IRIS OpenSpace‘.
You are now ready to upload files to IRIS OpenSpace.
Create a new IRIS OpenSpace account
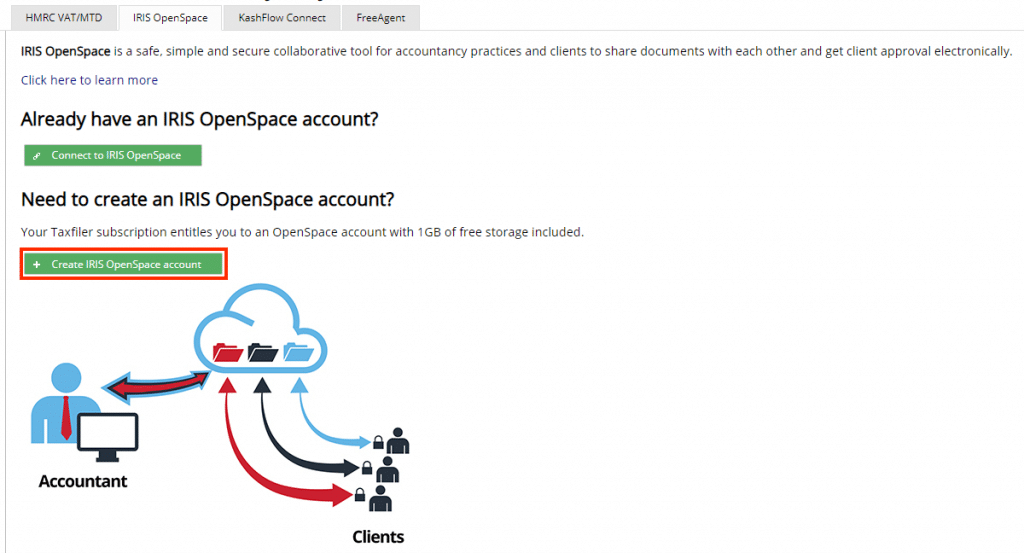
For Pro and Team pricing plans, you will be able to link to an existing IRIS OpenSpace account or create a new IRIS OpenSpace account from within Taxfiler (includes 1GB of storage).
To create a new IRIS OpenSpace account, click , enter your details and click Create.
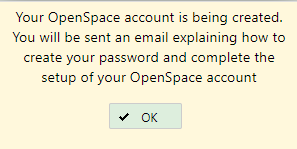
You will be sent an email in order to authorise your account and set up a password for your new IRIS OpenSpace account.
Once you have authorised your account and setup your password, within Taxfiler, click the Connections icon and select the IRIS OpenSpace tab. Click Connect to IRIS OpenSpace and enter the IRIS OpenSpace User name and Password.
A message will display confirming ‘Your account has been connected to IRIS OpenSpace’.
You are now ready to upload files to IRIS OpenSpace.
Create a tax return and upload to IRIS OpenSpace
Once you have prepared a tax return, select the Review & File tab within the tax return.
Once all errors have been cleared, and warnings considered, you will have the option to Prepare for filing:
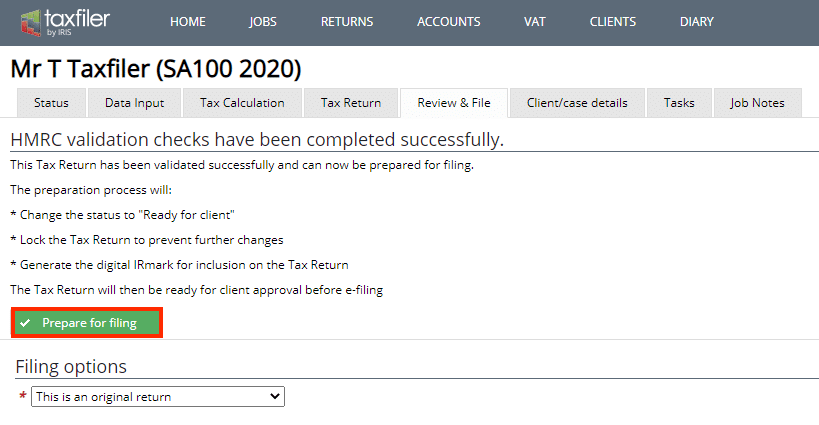
Click and you will have the option to upload the tax return to IRIS OpenSpace.
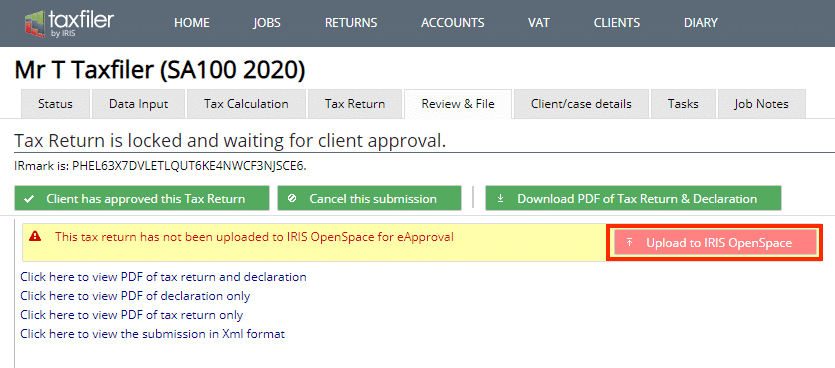
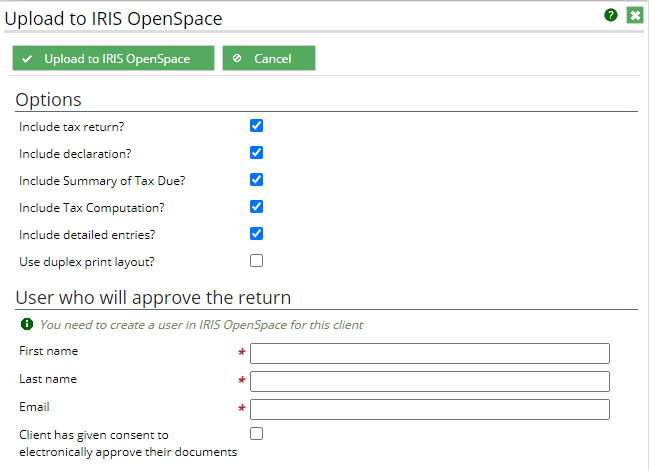
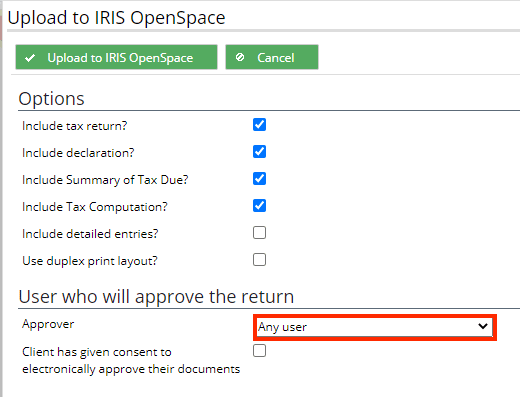
Click and a new window will open. Here you have the option to include the Tax computation and the option to use a duplex print layout by inserting ticks in the relevant boxes.
If you have linked an IRIS OpenSpace account that already has a folder for the client you are performing the upload for, in order for the link to IRIS OpenSpace to work correctly and select the existing client folder in IRIS OpenSpace, you must ensure that you use the same client codes between Taxfiler and IRIS OpenSpace.
If a client doesn’t exist in IRIS OpenSpace, Taxfiler will automatically create a folder for the client and you will be required to create an IRIS OpenSpace user account for your client. This account allows your client to login to IRIS OpenSpace and approve documents that are uploaded. This is only required to be setup the first time you send a document via IRIS OpenSpace for this client, the details will be saved for subsequent uploads in Taxfiler.
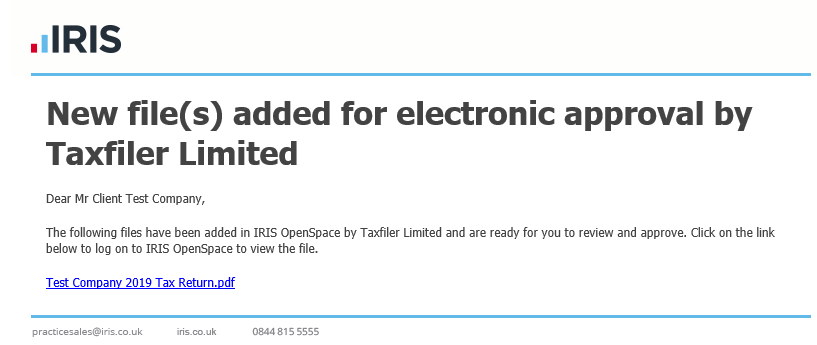
Your client will receive two emails from IRIS OpenSpace:
- advising that you have created an account for them and they are required to activate the account (example below, actual email may differ slightly).
- that you have sent them a document for approval with a link to that document.

Taxfiler will store the details of the user that you set up to approve documents, you will not be required to complete this screen when uploading subsequent documents to OpenSpace. Should this user need to be edited/changed or a different user added this can be done within your IRIS OpenSpace account, in ‘edit clients’.
If you require the documents to be sent to multiple persons, you can set up additional client details in your OpenSpace account. Taxfiler will give you the option to select from a drop-down list, the user that you wish the document to be sent to for approval. Selecting ‘Any user’ will send the document to all listed users.
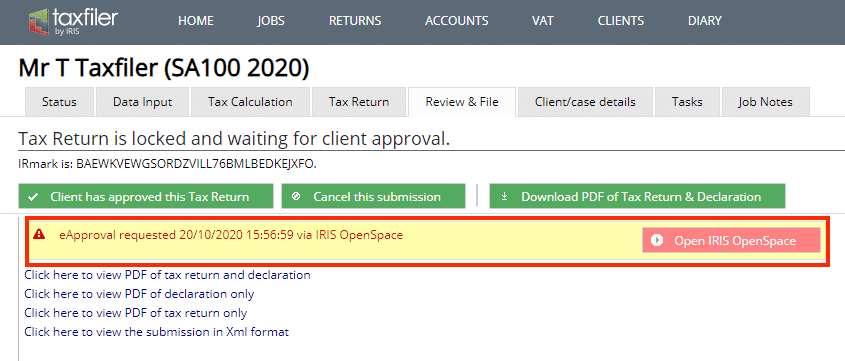
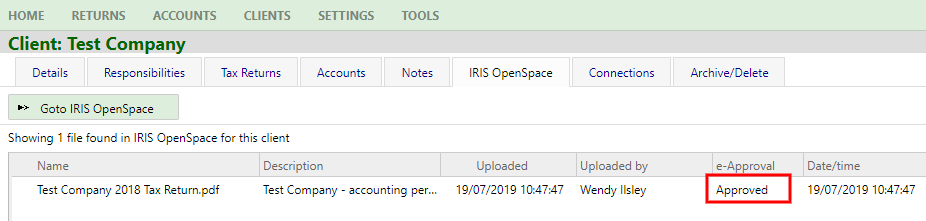
The Review & File tab will be updated to show that the document has been sent for approval via IRIS OpenSpace and gives you the option to open your IRIS OpenSpace account.
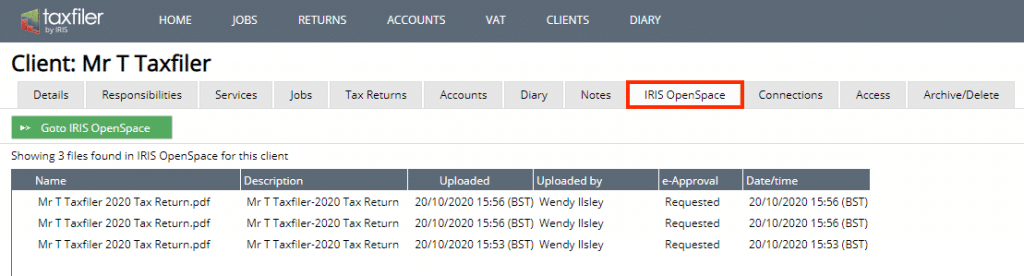
Taxfiler keeps a record of documents that have been uploaded for each client in the clients file, under a new tab for IRIS OpenSpace.
Once the client has activated their IRIS OpenSpace accounts and approved the document, you will see this displayed in the Review & File tab and the clients file will be updated. You will receive an email from IRIS OpenSpace confirming these events and within Taxfiler and the Review & File tab and the clients file will be updated to reflect that the document has been approved.
When you click , you will be redirected to your IRIS OpenSpace dashboard on the home page. Here you will be able to see the status of all the documents that you have sent using your IRIS OpenSpace account.
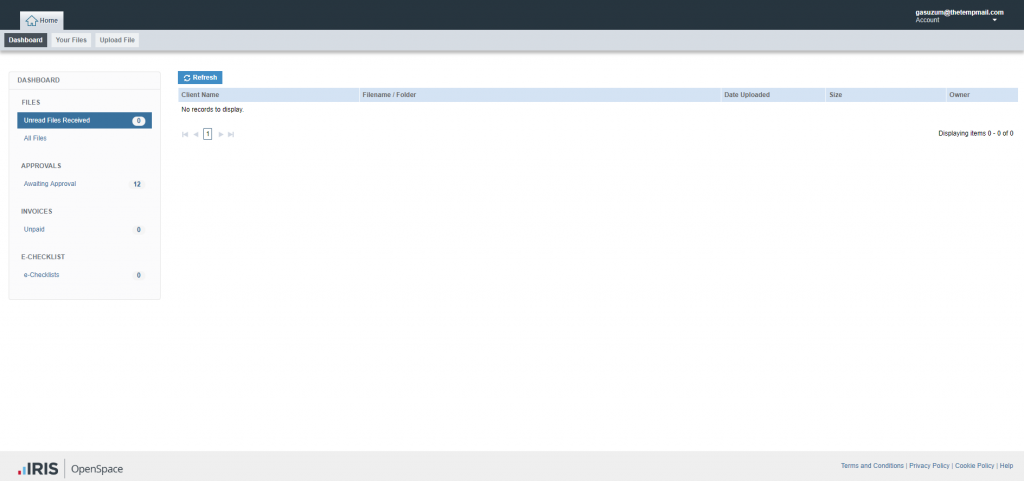
The Dashboard tab gives a view of all unread files that have been received, documents that have been sent for and are awaiting electronic approval, those that have been approved and rejected.
Within the main screen, you can sort the files displayed by client name, file name and description, date uploaded, size and owner.
The clients tab gives the option to view all clients assigned. Functions available here are; export a full client list, add a new client from here or search for client information using the search bar.
Information can be edited for an existing client by selecting the checkbox to the left of the client name and clicking ‘Edit Client’ in the top right-hand corner.
Clients can be sorted here by client ID, name, status, last login, total files and storage size being used.
The Upload file tab allows you to add additional documents to the clients file.
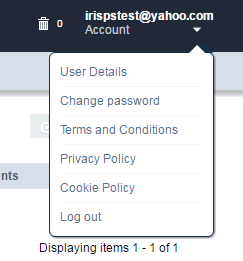
Account
Account setting are displayed in the top right-hand corner of the screen.
This allows the user to alter details, change their password or view the various policies and conditions held within the system.
The user can also log out from here.
Deleted Items
Click the dustbin to see a list of all recently deleted items.
Settings
The settings tab allows the client to customise all aspects of the OpenSpace system. The intricacies of this area will be covered separately, but the basic functionality available is as follows:
- Users -from this tab new practice users can be created as well as the ability to import a list of users into the system. Existing staff member profiles can be edited here, including assigning staff members to clients and changing permissions.
- Practice Details – here practice information can be edited, including the administrator email address. The email address is used by IRIS to send any important alerts and announcements. From here the default folder structure can be edited for each client. This will alter the files that each new client sees, depending upon how the practice wishes to organise its files.
- Customisation – this tab contains all the functionality to enable branding and customisation of the OpenSpace portal. This section will be covered in further detail later.
- Audit Log – the audit log contains details of every action within the system. This can be sorted by date, user, action, client and data.
- eApproval Logs – e-approval logs track all documents that have been uploaded for electronic approval including the status of the document, who it has been approved by and when it was last interacted with.
Subscription
Your Subscription
This tab is where storage requirements are managed and where current usage can be viewed. The right-hand side of the page displays the total files, clients and users on the system.
Files and folders can also be viewed within the client screen. These can be sorted by file size, to find the largest files, if for example, space allocation is incorrect.
Additional space can also be purchased, to be used on OpenSpace account.
For more information please refer to : https://www.iris.co.uk/products/iris-openspace/