Taxfiler Practice Management
Taxfiler Practice Management is a powerful tool for assigning and monitoring work due for clients, helping you prioritise tasks, and ensure deadlines are met.
Taxfiler has created a process to assist with the initial set up of Practice Management, where the system will create services and jobs based on work you have done for clients in the previous 12 to 24 months.
Services will be created for the following:
- Sole Trader Accounts
- Personal Tax Return
- Company Accounts
- Corporation Tax
- Partnership Accounts
- LLP Accounts
- Partnership Tax Return
- Trust Tax Return
- VAT
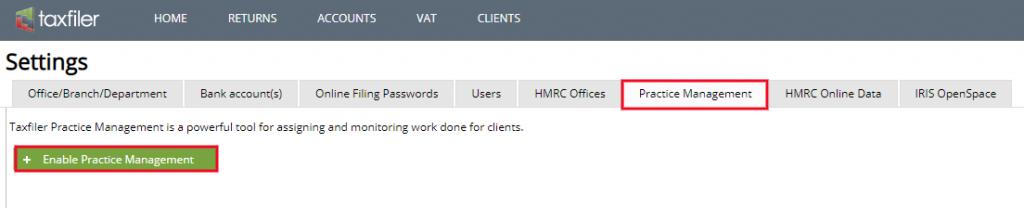
Enabling Practice Management Functionality
For existing Taxfiler accounts, Practice Management functionality can be enabled retrospectively. This is done via the Settings option/Practice Management tab. Click + Enable Practice Management:
A window will open with three available options, Create, Enable and Cancel:
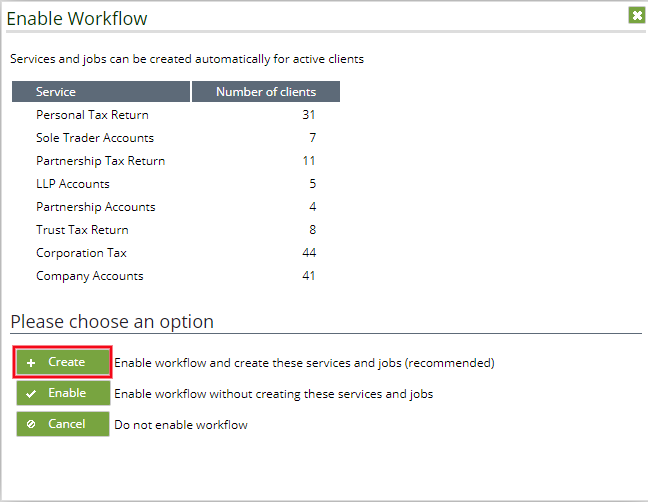
Create – enables Practice Management and will create services and jobs based on the work you have done for the client in the past 12 months.
Enable – enables Practice Management but will not create the services and jobs for your clients, you will need to create these manually for each client.
Cancel – Practice Management will not be enabled. You can enable Practice Management at a later stage from the Settings menu and selecting enable Taxfiler Practice Management.
Working with Practice Management
Home page
The home page now contains three tabs, My Tasks, My Jobs and Recent Cases.
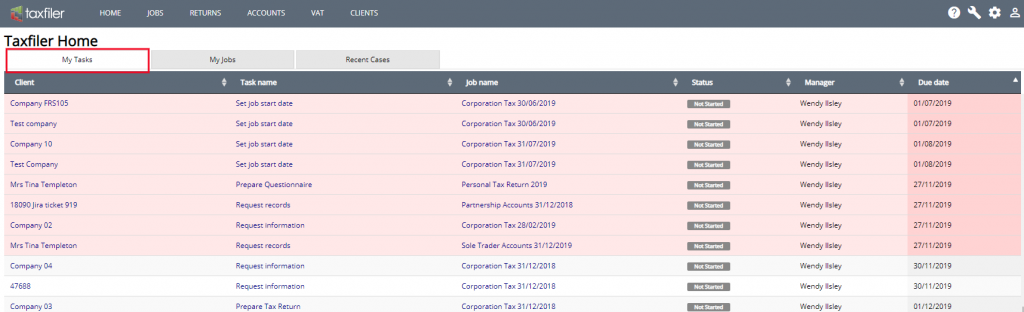
My Tasks
This will show all tasks that are assigned to you. You will not see tasks that are allocated to other users. Where a task due date equals today or a date in the past this will be highlighted.
- If you click the Client name, the system will take you to the details tab of the client file.
- If you click the Task name, the system will open on a related screen; for example, if the accounts are awaiting review, the system will open the Review & File tab for the client. Where the accounts have not yet been created, the system will open the create accounts screen.
- If you click the Job name, the system will open the job details page for that job.
- The Status shows the current job’s current status.
- Next is the Manager assigned to the job.
- Due date is the due date of the current task. This date can be edited via the tasks screen for the job. This page is sorted in date order by default but can be changed if you require.
My Jobs
This screen will show those jobs that are allocated to you if you are assigned as any of the following, partner, manager or staff. Or if you are assigned to a task within a job.
- If you click the Client name, the system will take you to the details tab of the client file.
- If you click the Job name, the system will open the job details page for that job.
- If you click the Next task, the system will open a related screen. For example, if the accounts are awaiting review, the system will open the Review & File tab for the client. Where the accounts have not yet been created the system will open the create accounts screen.
- Status will show the current status of the current task.
- Task Due shows the due date for the current task.
- Assigned to shows the assignee of the current task.
- Stat deadline is the statutory deadline for the job.
Recent Cases
Will show cases that you have recently worked on.
- Code is the client code as entered when creating the client.
- Name is your clients name
- UTR, your clients unique tax reference number
- Year/period, these two columns show the tax year for the tax return or the period for the accounts
- Type shows the service type for the client
- Status shows the status of the tax return or the status of the accounts.
Job Planning
Jobs that are created via the system wizard will have a due date of the period end +1 day and will be allocated to a manager with the first task being that of setting a start date for the job, or to postpone to an alternative date, as in the screenshot below:
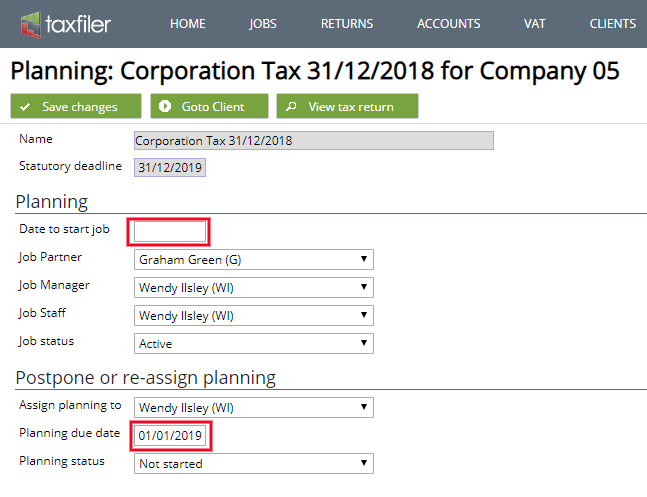
Yellow warning messages display if there are tasks or jobs that are not assigned to anyone. We suggest that these get dealt with as soon as possible. However, the warning messages can be closed while you are working on the screen, by clicking the cross on the far-right of each warning message. Warning messages will re-appear when you refresh or re-open the screen.

Adding Jobs when creating a new client

Select CLIENTS from the main menu.
Click + Create new Client.
Complete the details requested on the screen. See https://taxfiler.co.uk/support/adding-a-new-client/ for additional information.
When entering the details for a company, if you use the Look up Company Number function, the Accounts period end date will be populated. The system uses this field when creating the services and jobs for this client. If this field is not completed you will be able to enter it manually for each client for each job.
After clicking Create a new screen open. Here you can tick the services that relate to the client, in other words, what jobs you are going to be doing for the client each year.
Note: Taxfiler only lists those services that are applicable for the type of client you are creating.
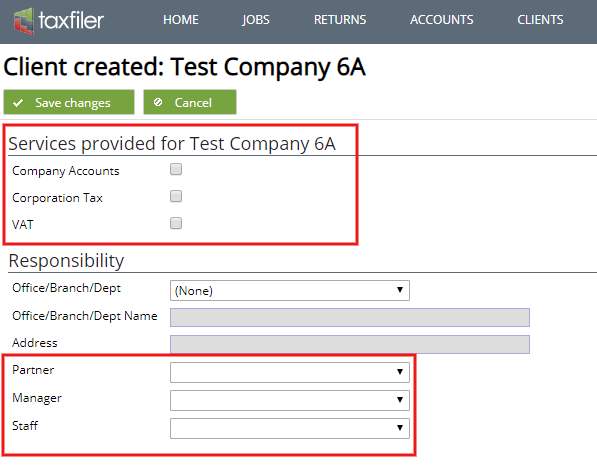
Tick the services required, and where you have a multiuser license with Taxfiler, set the Partner, Manager and Staff member responsible for the client. Specific tasks can be updated individually if required. Should a member of staff not be available, another staff member can be assigned to the task. This does not update the responsibility on the service.
Where you are a single user, these fields should all be auto-populated with your details. Click Save Changes and the system will create the jobs that relate to the services you have selected.
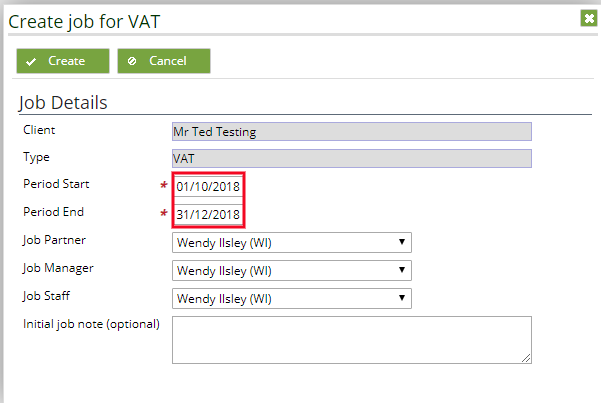
If you have selected VAT as a service, a pop-up window will open, and you will be asked to enter the VAT period dates. The system defaults to calculate a quarterly return, however if you are on a monthly return cycle, change the period end date to the end of the month and the system will pick up that you are preparing monthly VAT.
If you have not entered the Account period end date, a pop-up window will open for each job being created so that you can specify the dates.
Initial job note, is an optional field should you wish to leave a job note on the client. This field is linked to the Notes tab on the job details screen.
Click Create to returned to the clients account.
The Jobs tab on the client account will show a list of the jobs for this client:
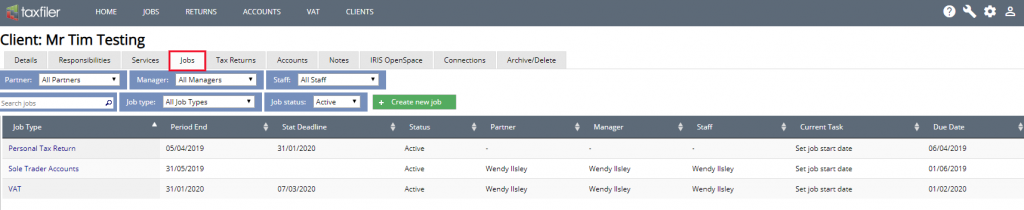
JOBS on the main menu, will show the same columns as above but will list all clients that you have jobs created for.
If you click on a job listed under Job Type you will be taken to the job details screen.
There are four tabs:
- Job Details
- Tasks
- Notes
- History
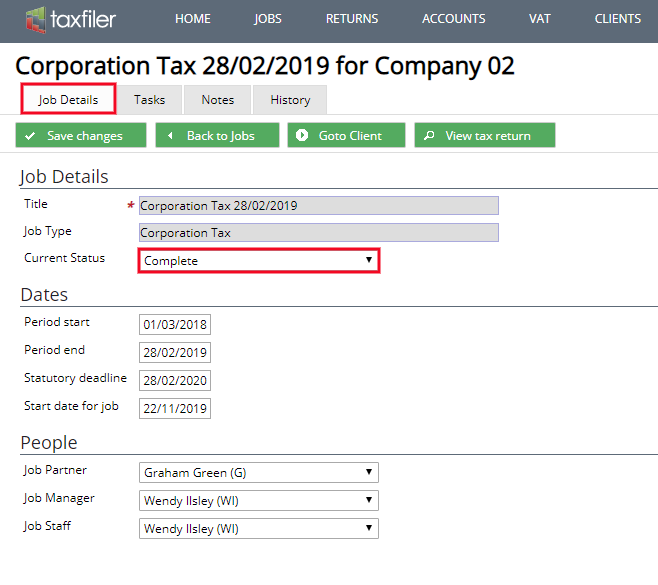
Job Details
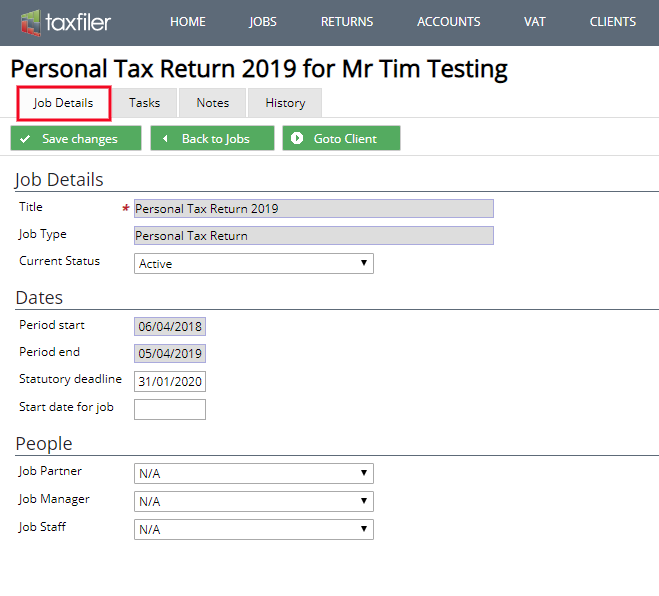
Here you can update/edit the dates and change the people responsible for the job if required. Remember to save changes if you have updated any fields.
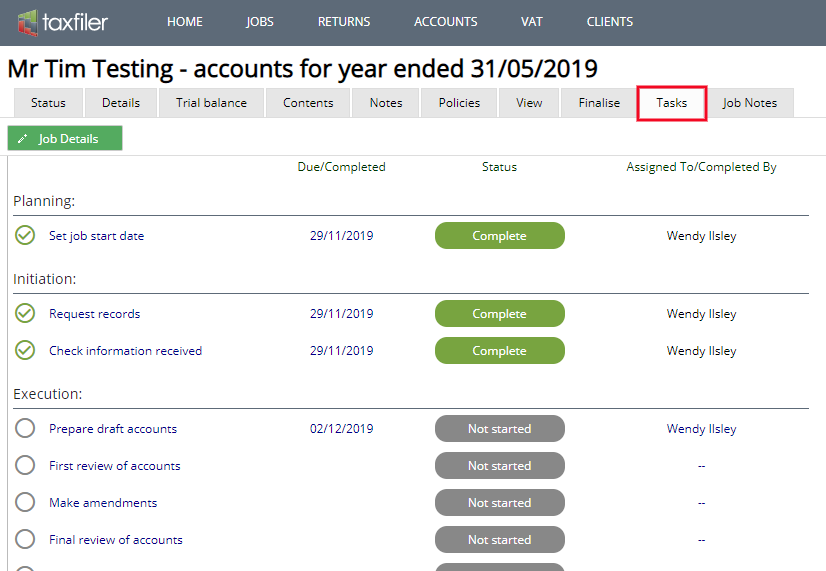
Tasks
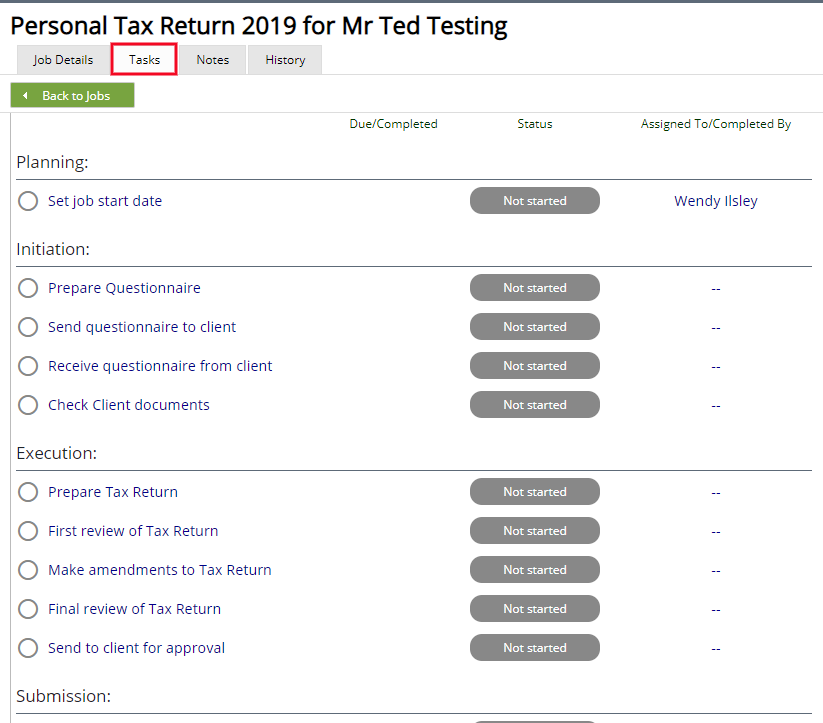
Here you can see the individual tasks that are required in order to complete a job.
Click the Status of the task to update.
The options available are:
- Not started
- In Progress
- Waiting
- Complete
- Rejected
- N/A
The system will automatically update the Due/Completed date field, the field will show the due date until marked complete or N/A, at which point it updates the field and shows the date the task was completed. It then updates the due date of the next task, and where possible updates the status of the task.
Notes
Click New note, a pop-up window will open where you can enter any applicable job/task notes. The time and user is stored on the note.
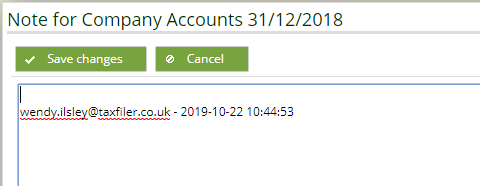
Notes are then displayed one after the other; these can be edited or deleted.

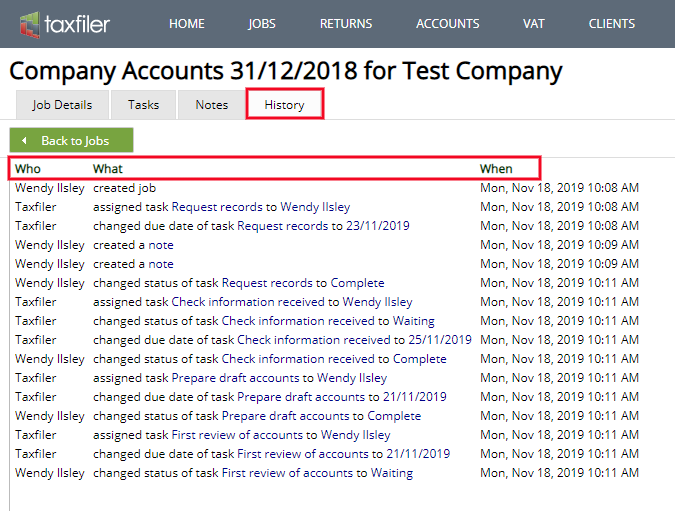
History
The History tab shows who processed or updated a task, what the task and change is and when the change was made:
Updating the tasks from within the Accounts or Tax Return modules
Where the tasks relate to functions within Taxfiler, that is, Accounts or Tax Returns, the task status is included in a section titled Practice Management Task. The status of each task can be updated using the drop-down list. This will also update the tasks on the Jobs tab for this client.
There are areas within Taxfiler where the status is automatically updated as a task is completed; within Taxfiler Accounts or Tax Return modules. An example of this is when a Tax Return is successfully submitted to HMRC.

The tasks list is available for each client from within their Tax Return module and their Accounts module:
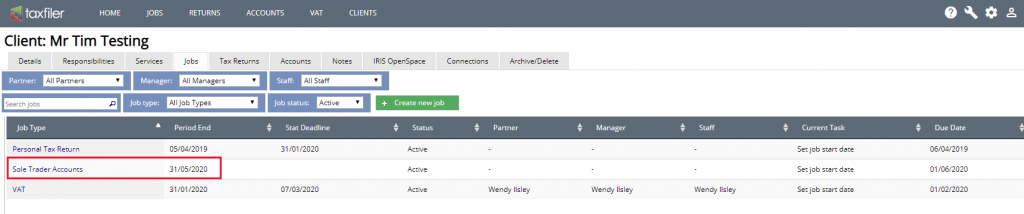
On the completion of a job, a job for the new year will be created by the system.
The associated document in Taxfiler will not be created initially. That is, on completion of a Personal Tax Return 2019, the system will not create a new Tax Return for 2020, but the job Personal Tax Return 2020 will be created.
New job has been created for the following year:
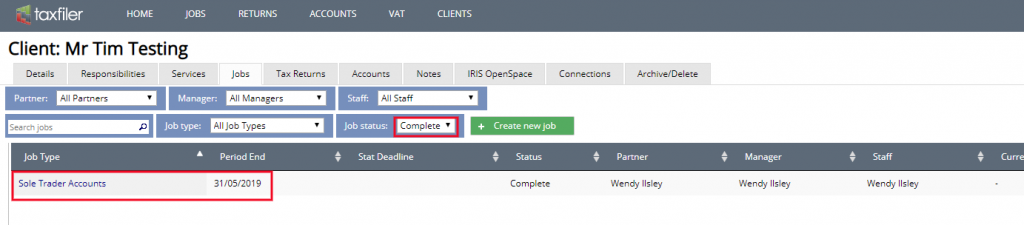
Completed tasks can still be seen via the client Jobs tab, if you use the Complete filter.
Removing a service
If you are no longer providing a service for a client, you can delete the service. Deleting a service will not remove any jobs that have been created. Deleting a service will stop new jobs being created when the current job is completed.
Select the Services tab from the within the client and click on the service you wish to delete:

Click Delete:

Confirm that you wish to delete the service. There is no undo option.
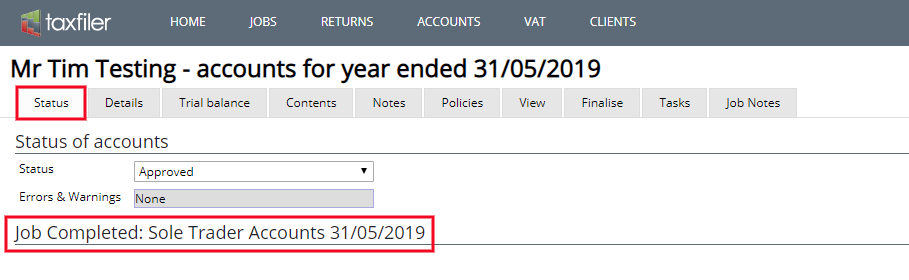
Completing or closing a job
Marking a job as Complete where a service exists, the system will create a new job for the next year. This outcome is the same as marking each task within a job as complete.
Marking a job as Complete where there is no service, the system will not create a new job for the next year.
Marking a job as Closed will not create a new job for the next year.
Go to the Job details page, and mark the current status as Complete or Closed.